A Simon-playing robot
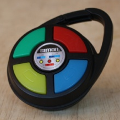
My 7-year-old daughter and I recently finished a project which we’ve been working on for almost exactly a year, on and off. We built a robot which plays the memory game ‘Simon’, and can beat it.
We both found it very satisfying to get this project completed; there was huge excitement as the finished robot started successfully playing the Simon game all by itself.
A short (c.3′) video gives the idea of what we built and how it looks in action. Skip to 1:30 if you’re really impatient and just want to see the robot working:
The rest of this post gives a few more details.
Chassis, base-plate and fingers
We knew that most of the robot would be around and above the Simon game, but that we’d need some parts underneath. The starting point, then, was a chassis using large yoghurt pots for legs, with a base-plate (plastic chopping board) across the top. Everything attaches onto either the top or the bottom of the base-plate.
The next step was to make the ‘fingers’, using angled pieces of Lego pivoted at fixed base parts. They’re not all completely identical, but they all work in the same way. The finger mechanisms are screwed to the robot’s base-plate through the existing holes in the base Lego pieces.
There are elastic bands to return each finger to its ‘up’ position, where the finger rests against an end-stop. (Towards the end of the project, we had to replace one of the elastic bands because it had perished from age.)
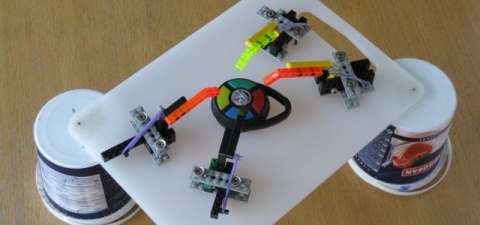
So far, we have the Simon game itself blu-tacked onto the middle of the base-plate, with a finger hovering over each button:
Light sensors
For the robot to know which lights are flashing, we decided to keep things simple and have an individual sensor for each of the four segments of the game. Pieces of thick solid-core copper wire are rigid enough to hold their shape well, but can be bent to get the ends positioned over each light. The actual light sensors will be attached to these supports:
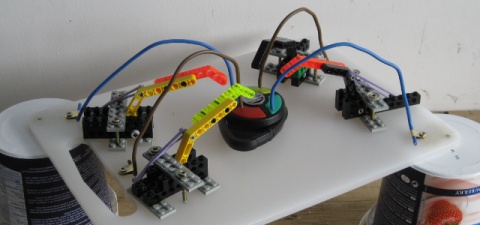
The LED inside each game segment isn’t exactly in the middle, which is handy as the sensor can be over the LED and still leave room next to it for the finger to press the button.
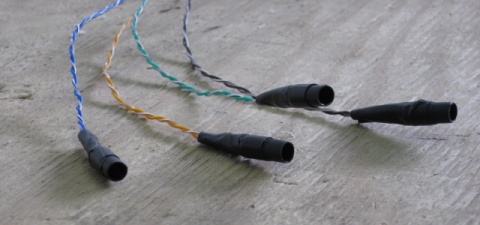
For light sensors, we used BPV11 phototransistors stuck in a piece of black heat-shrink to block ambient light:

We have four of these soldered to twisted-pair leads (leaving the phototransistor’s base unconnected):
These are attached to the solid-core copper wire supports using cable-ties; see pictures below.
Next, though, we turned our attention back to the fingers.
Servos for actuating fingers
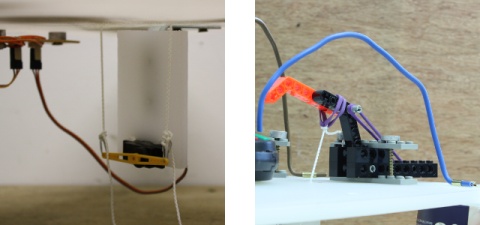
The robot has four fingers, but it only ever needs to be able to press one game button at a time. So we can use only two servos, where each servo can pull down on one of a choice of two fingers, by rotating in different directions. The pulling is done with strings which pass through holes in the base-plate, and tie onto the fingers via elastic bands. The elastic bands are to ensure there is no hard limit for the servos to strain against, while still allowing the robot to generate enough force to press the button on the Simon game.
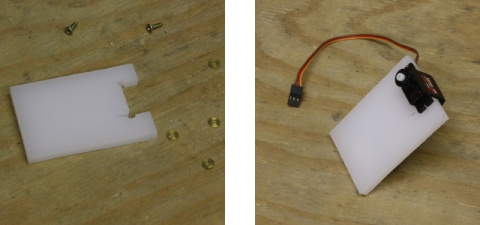
The servos are hot-glued onto brackets on the underside of the base-plate. The brackets are made of pieces of another chopping board and small metal angle-brackets.
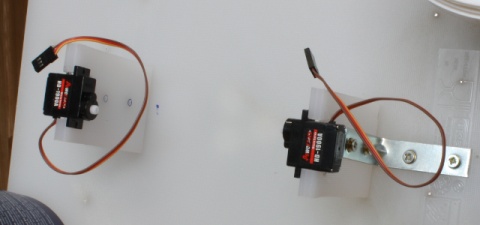
Once connected together with strings, the set-up looks like this below the base-plate (left) and above it (right, where the elastic band attachment can be seen):
Arduino
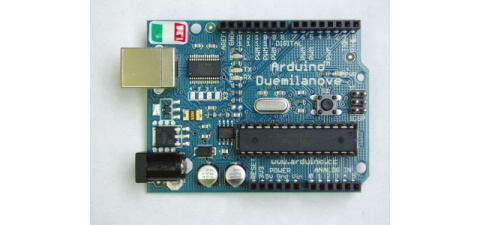
The choice for the ‘brains’ of the robot was between an Arduino and a Raspberry Pi; the ready availability of a servo control library for the Arduino made it the winner.
At this point we had the servos working, but had not yet completed the light sensing system. We therefore had a robot which played Simon, but only if a human used a laptop to tell it which colours were flashing. Many months had already gone by since the launch of the project, so I offered the option of declaring this a good point to stop if my daughter had had enough of the project. Very pleasingly, though, she was keen to press on with the full system, and get the light sensors working as well.
Light sensor amplifier circuit
Dusting off the Horowitz and Hill, supplemented with some research on the internet, I came up with this small circuit to amplify the tiny current from the phototransistor into a voltage the Arduino could read:
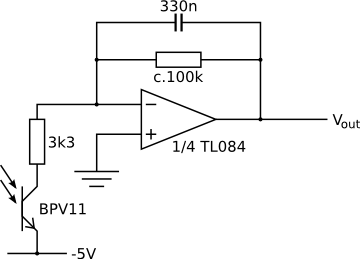
We need four circuits like this, one per light sensor. Unfortunately, the only big enough piece of stripboard I had to hand was tri-pad board, so the full four-fold circuit required an unholy tangle of jumper wires. The soldering was done about half and half by me and my daughter:
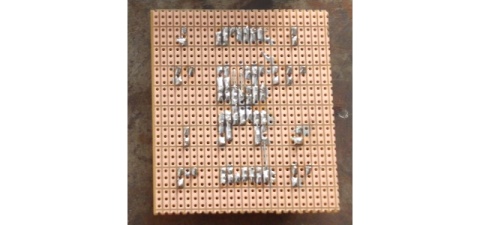
Neither of us burnt our fingers.
The component side, ready for the op-amp chip to be socketed, looked like this:
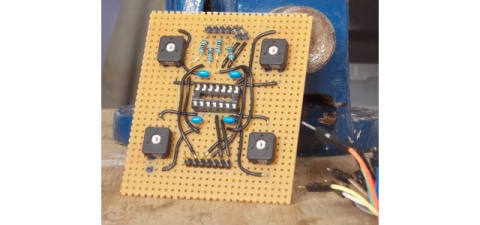
I used 100k trimpots for the feedback resistors, to be able to set the gain independently for the four colours. The phototransistor is more sensitive to red than blue light.
Re-work to tune gain of blue and green channels
Annoyingly, I guessed wrong. It turned out that the BPV11’s sensitivity to the blue and green lights was so low that the gain of the amplifier was insufficient, even with it turned up to eleven. Increasing the feedback resistor by splicing in another one fixed this:
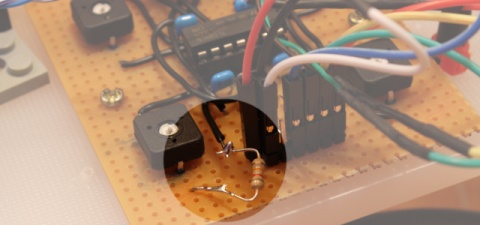
(This also increased the time-constant of the low-pass filter, resulting in more aggressive smoothing, but this didn’t seem to matter.)
Final hardware assembly
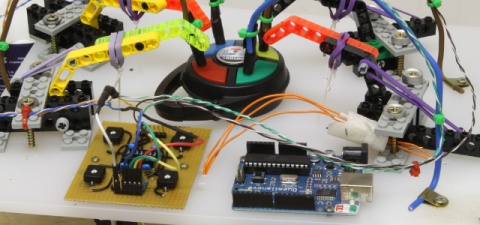
There were now only a couple of pieces of hardware work to do: Insert the op-amp chip; neaten up the Arduino/servo connections by using proper jumper wires; and connect the four outputs from the amplifier board to four analog inputs of the Arduino.
Firmware
The program controlling the robot is not too complicated.
There are routines to press the four different buttons, by commanding the relevant servo to an appropriate angle, delaying, then commanding it to return to ‘neutral’. There are two fingers per servo — for each servo, an anticlockwise rotation pulls one of its controlled fingers down, a clockwise rotation pulls the other finger down, and there is a central ‘neutral’ position where neither finger is pulled down. There were thus six angles to calibrate altogether, and also the required delays.
The function which detects which light is currently lit (if any) compares each analog reading to a threshold. Each sensor has its own threshold. After some experiments, I adopted the approach of having a start-up auto-calibration phase, where each sensor measures the ambient reading for two seconds. The threshold for a sensor is then set to slightly higher than the maximum reading seen by that sensor during the calibration phase.
To play the game, the program loops, waiting for one second to go by during which no lights flash. At this point it concludes that the Simon game has finished displaying the sequence, and that the light flash most recently sensed is the ‘new colour’, to be appended to the previous detected sequence. It calls the finger-actuating routines to replay the sequence; the program then returns to monitoring the sensors.
Final fully self-contained robot
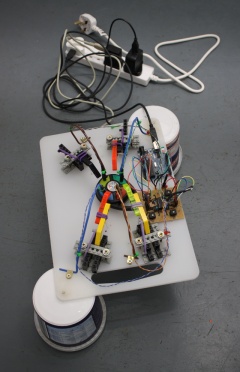
The final robot needs no laptop (but it does need three separate USB power supplies: +5V for the Arduino, a separate +5V for the servos, and -5V for the op-amp, obtained by swapping the positive and negative on the third power supply).
The mini-Simon game looks a bit lost in the middle there, but it is possible to remove it. This is just as well; we got through three sets of batteries for it while testing and tweaking.
Success!
The video at the top of the post shows edited highlights of a successful game played by the robot.
For the patient, here are two full unedited videos of it playing a game of Simon to completion. Each game takes 528 button presses altogether.
This one was shot before we updated the code with the knowledge that 32 flashes is the longest sequence Simon produces before conceding. The robot therefore continues to mash at the buttons after the end of the game:
The batteries on Simon were beginning to flag, and the tones it plays droop in pitch quite noticeably by the end.
This second one (from which the excerpts for the top video were taken) was shot after modifying the firmware to stop after it’s replayed the 32-flash sequence:
Limitations
This is not an industrial-strength robot. It’s quite fussy about ambient light, even with the calibration. This explains the slightly grainy videos, as they had to be shot without proper lighting. Once or twice, the finger-pulling elastic bands slipped, meaning a finger didn’t completely press its button and the game was lost. Also, I think the robot would have been better with some flashing lights.
Final thoughts
The whole project was great fun, and although I was fairly certain from the start that we’d be able to get it to work, it was still very cool to see our robot beating Simon.
I’m also pleased not to have exhausted my daughter’s enthusiasm for this kind of thing: a few minutes after this one was working, she asked ‘what robot will we build next?’.